Posts

Showing posts from 2017

Why is the Delete Worksheet Option Disabled in Excel?

Image
In Excel you have to option to delete worksheets as soon as you realize that you don't need it anymore, this can be easily done by right-clicking on the tab you want to delete and select this action. However, sometimes you will see that this option is not enabled.     This option is disabled when the workbook is shared, so more people can collaborate to the file at the same time, this situation is shown in the title of the file, this will include '(Shared)'.     To disable the shared property of the workbook go to 'Review' ribbon and select 'Share Workbook' option.     Then, you will see the list of users that have the workbook open, once you uncheck the 'Allow changes by more than one user at the same time...' box and accept, the workbook will lose its shared property.    After this, you try again and notice that the 'Delete' option is enabled again and ready to use.      Consider that the 'Shared Workshee...

Preventing Excel File to Open or Edit with Password

Image
When you have an Excel file and don’t want everyone to open or edit it but only specific people then you could protect the file with a password. To do this, you have to use the ‘Save As...’ option and select ‘Browser’:   In the typical window to save the file, go to ‘Tools’ option and then select ‘General Options...’:   With that selection, you will be able to set a password that will be asked when opening or editing the file, without the right password the file will not open or edit:   This is the popup that will appear to anyone after setting the protection:   Also, you can use this option to set a recommendation when opening the file to use it as read-only, to do this just check the box ‘Recommend as read-only’ located under the password box, then when opening the file will always show this:      This read-only function can be used without setting a password.

Fixing Excel When Scrolling Sheet Instead of Moving Cell Selector

Image
When you have in Excel your cells like this:     And use the arrows on the keyboard to move to the right, for example, you will move the cell selector to the right cell:     However, I have seen that in some cases the result is not that, instead, when pressing the previous key the entire spreadsheet is scrolled to the right, with the cell selector staying in the same place:       This happens when the ‘Scroll Lock’ in pressed in the keyboard, then to fix it just press it again, but nowadays many keyboards have no this key, therefore, to fix this situation you should use the keyboard on screen, to open this keyboard in Windows go to ‘Start’ and search for ‘On-Screen Keyboard’, once you select it you will see this:   You see that the ‘Scroll Lock’ key is highlighted, click on it to disable this function and close the keyboard, now you recovered the usual behavior of the arrows keys in Excel.

Showing Pivot Table as Simple Table in Excel

Image
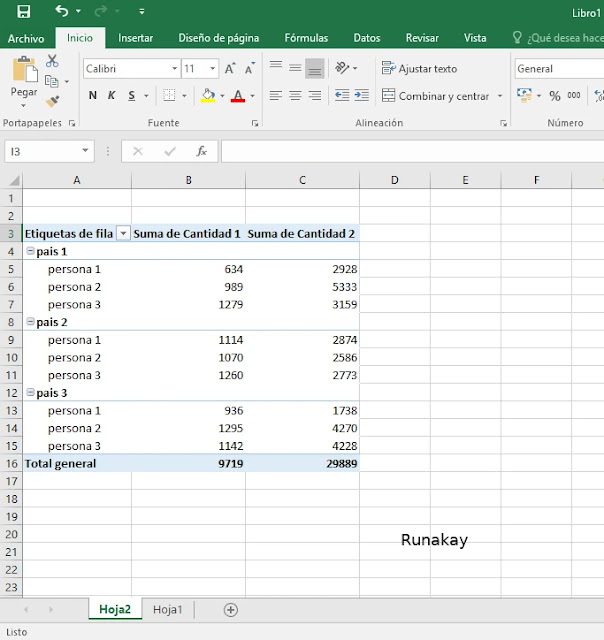
When you are working with pivot tables in Excel you see that they have a grouping scheme where one data of higher hierarchy is shown as a group header instead of being repeated for each row:       However, if you want to see it as a simple table (tabular table with data repetition for each row) you can do it keeping the pivot table properties by clicking on the table to enable the ‘Analyze’ and ‘Design’ tabs in the ribbon:      Then, go to ‘Design’ tab and under ‘Report Layout’ select ‘Show in Tabular Form’ option:     After that, your pivot table will be in a classical view (simple, tabular table):   Now, you will be able to manage this table as a tabular one, for example you can copy it to another sheet if you want to have the information but without grouping.

Avoiding to Mark as Read in Outlook by Accident

Image
When using Outlook , it offers a 'Reading Pane' function that allows you to read the selected email in the same window (not required to double click on it to open it). After this, the email is marked as read and you won't need to read it again, which is perfect. However, if you select accidentally an email this will be marked as read when you didn't want to read it, to avoid this you can avoid the 'Reading Pane' or you can change how this 'Mark as read' function works. To do the last one, go to 'File' and select 'Options'.   In 'Options', go to 'Mail' and then locate 'Outlook panes' section, click on 'Reading Pane...' and there you can disable the behavior explained before, it will require to open the mail with double click to mark it as read. Once you have this modified, you won't have more mails read by accident.

Recovering Theme in Windows 8

Image
Long time ago a friend called me because suddenly her Windows 8 screen just got black.   It happens when you change the theme of Windows, this can be done by going to 'Start' screen and type 'personalization' and select this feature.   Then you choose a different theme if you don't like the black one.   For example, you can select the default theme, this one will give the usual Windows look and feel. You have to be aware of the shortcut that Windows has to change the contrast of the theme, if you press Shift + Alt + Print Screen buttons the theme is going to change to a black one. If don't want to follow the steps before just press the same buttons to undo the change.

Disabling Always Appearing Research Window in Excel

Image
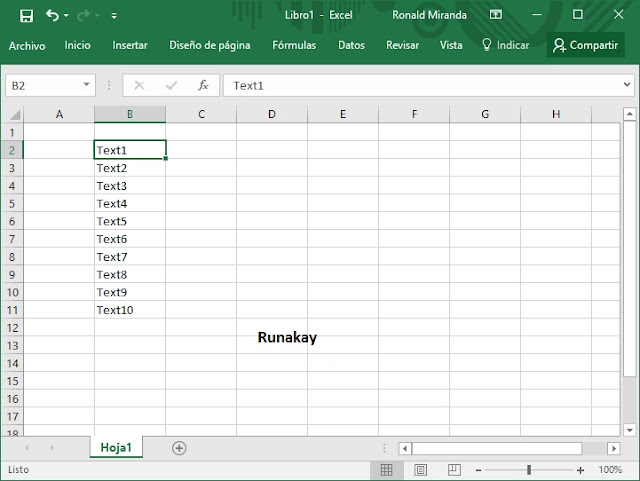
I have seen many cases when someone is working in Excel and have a set of text cells like shown below.      Everything is working normally, however, suddenly you start to have a problem when clicking your cells, now it's appearing the 'Research' window using the word in the selected cell.     And that happens with every click you do, you can close the window, but when you click in a cell again it appears anyway.     Now, you have to know that this window appears when you click on a cell while you are pressing 'Alt' or 'AltGr' key, therefore, if you are not pressing one of those keys probably they got stuck there. To fix it just press a few times your 'Alt' or 'AltGr' key until the 'Research' window doesn't appear anymore.

Using Your Laptop as Hotspot

Image
If you have a laptop o computer with a wired network card and a wireless one so you could use it as a hotspot to share internet to others by using mHotspot . First, you have to download the installer, once you do it run the installer, this is going to display but don't use the quick installation, you need to customize (don't check on 'Install Wander Burst...'):   Then, you have to uncheck the 'TuneUp Utilities' to get not installed, then click 'Next':   The installation will finish and you can execute it, fill 'Hotspot name', put the password and click on 'Start Hotspot':    Wait for a little and you will see 'Hotspot: ON' and others now will be ready to connect to this virtual hotspot and have internet:   It doesn't work if you have only one wireless card, or at least I couldn't make it work and haven't found documentation about it.

Adding Website to Your Android Home Screen

Image
Sometimes you are using (because you like to or have to) a web page from your Android device and you think that I would be better if you could access directly, maybe using an application on your screen or having it as a bookmark on your browser. Unfortunately not all webpages offers their own application for quick access, and using a bookmark force you to start the browser, then go to the bookmarks section, then search between bookmarks what you want and then click on it. What you can do if there is no application to help you is to 'pin' that web in your home screen so you can access it directly. To do that, first start you default web browser (in this case Chromium ), go to your favorite web and click on options (button with 3 dots):   Next click on 'Add to Home screen' option:     Write the name for this direct access:     And it's done, now you can go to that page directly by clicking on its icon on the home screen: I have seen other b...