Posts

Unbrick or Recover Xiaomi Redmi 10A and other MTK devices

Case: Your Redmi 10A (probably other MTK devices too) is not turning on and doesn't react to any button pressed nor cable connection. Requisites:   Dead phone USB Cable  You tried tons of tutorials to unbrick the phone and didn't work This image Willingness to even use Linux to fix it (it's not hard) Steps: Create a bootable USB using the image downloaded. Make sure your computer allows booting from USB. Boot the computer from the bootable USB. When booting, a list of options will be shown. Pick the first one: Boot Live system. Once the system is loaded, go to the right-upper corner to connect to Wi-Fi. Once you have internet, use the Firefox browser (click on the icon in the left-upper corner) and download the Linux version of this tool (SP Flash) and save it in the desktop. Unzip the tool downloaded. Download the fastboot version of the stock ROM . Unzip the ROM, to have the folder and files. Click on 'MTK' icon that is in the desktop. In the command line opene...
Clear Automatically Microsoft Teams Cache

Image
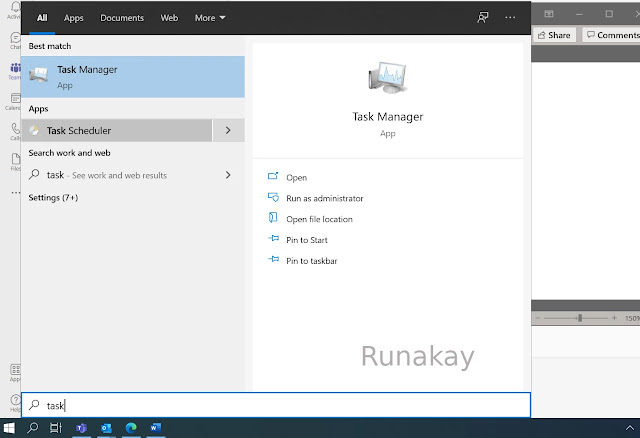
Case: You want to delete periodically the cache files of Microsoft Teams to make it lighter. Requisites: Microsoft Teams cache folder path. You can find it by going to your user folder and then go to 'AppData\Roaming\Microsoft\teams\Code Cache'. Steps: Go to 'Task Manager': Right click on 'Task Scheduler' and click on 'Create Task...':   Put a name for the task, set some options and click on 'OK': Under 'Triggers', create or edit a trigger:     Set the frequency for the trigger execution and enable it: Under 'Actions', create or edit an action: Pick 'Start a program' as action, type 'cmd' as program and add as arguments: /c "del /Q /S "C:\Users\<your_username>\AppData\Roaming\Microsoft\teams\Code Cache\*"   Results: The cache files of Microsoft Teams will be clear automatically on the frequency scheduled.  

Create a Tree View for Your Pages in Sharepoint

Image
Case: You have some pages in Sharepoint that you want to present as a tree due to the parent-child relationship between them. Requisites: Pages created in Sharepoint. Steps: Open each page and use the 'Promote' option: Click on 'Add page to navigation':   You will have all the pages shown in the navigation bar:   Edit the navigation bar and click '...', 'Make sub link' for the page that you want to be a child of the previous page in the navigation bar:   Repeat the steps until you see the structure you want and save it:   Results: The pages will look as parents and children in the navigation bar:  

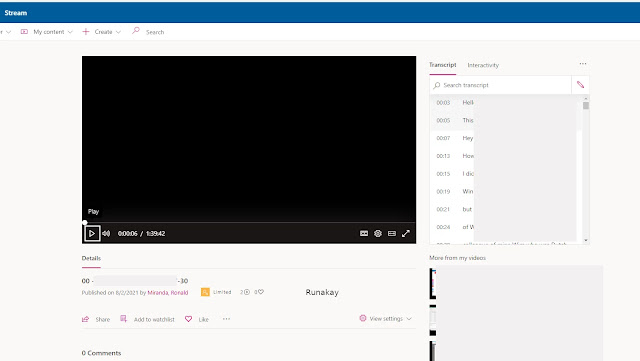
Download Video Transcript from Microsoft Stream

Image
Case: You have a video in Microsoft Stream with transcription enabled and you want to download the transcript. Requisites: Video in Microsoft Stream with transcription enabled. Steps: Open the video in Microsoft Stream. Click on '...' and 'Update video details'. Click on 'Download file' under the 'Options' section and save the vtt file. Go to https://web.microsoftstream.com/VTTCleaner/CleanVTT.html Upload the vtt file with the 'Choose Files' option. Results: The webpage will show the vtt formatted and ready to be copied, therefore, you can use the text as you wish.  

Stop Spam or Phishing Email Without Filtering

Image
Case: You receive spam or phishing in your email inbox and you want to avoid it without using the spam or phishing filter. Requisites: None. Steps: Open the email in your inbox.   Show email's header, in Gmail use the 'Show original' option.  In the header, find the 'Received: from' section and copy the IP address (last numbers between brackets). Go to https://check-host.net/ip-info , put the IP in the textbox and click on 'Info'. Look for the 'Whois' section and click on 'Retrieve whois data'. Look for any 'abuse' section where you can get the email to report the spam or phishing email. Report the situation to the email you just found. Results: The IP that sent the email reported will stop sending spam or phishing emails.

Create a Folder Grouping Messages From Different Accounts in Thunderbird

Image
Case: You have several accounts in Thunderbird and you want to have one folder that will show you the messages from all the accounts. In this case the folder will show all the emails in the sent folder of each account that where sent in less than 7 days. Requisites: Thunderbird. Steps: Go to 'Local Folders' and then to 'Search Messages...'.     Click on 'Save as Virtual Folder'.   Put a name to the new folder and click on 'Choose...'.   Check the folders you want the messages to be collected from and click 'OK'.       Tick 'Search Online' and put the criteria, in this case all the messages that were sent less than 7 days. Then click on 'Update'. Results: The 'Sent' folder will be created and will show the messages in the folders defined that comply with the criteria.