Posts

Inserting Rows o Columns in Excel Not Permitted

Image
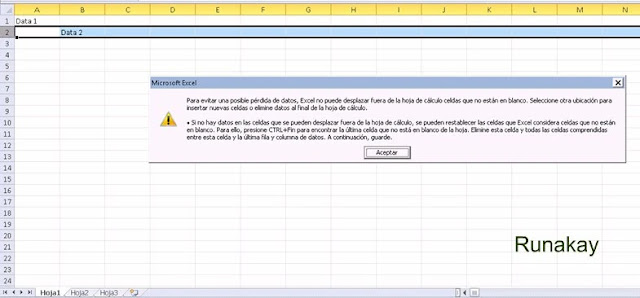
I'm opening an Excel file and when I try to insert a new row or column I get a message error giving me a large text about how this is not possible. I have seen many people facing this message, although this gives the solution, sometimes it's hard to understand what this message is trying to say.     But, what's happening? Let me tell you that you' re using all the rows or columns of the file, yes, believe it or not you are having information (even blank space) at least at the last row or column allowed. So, when you want to add a new one, Excel tries to delete this row or column because it will be out of range with the new element inserted. The solution is going to the last column or row, to do so you can use this shortcut: Ctrl + Down arrow if you want to go to the last row or Ctrl + Right arrow to go to the last column, as shown in the images.         Then, you just have to select the entire row or column and delete, the next step is to save ...

Fastest Way to Know the Size of Files or Folders

Image
Hi there! this time I'm going to show you a quick way to know the total size of any select files or folders. My idea is to give a sum up about how this task is accomplished typically so, you first select the elements you want to measure, this by using "Ctrl" key and click over the files or folders without releasing the key. As a second step you click the right button of your mouse and select "Properties" option displayed in the menu. With the procedure explain lines above you'll finally get here, where you will see the total amount of space used by the chosen elements. And what is the trick? Well, it's quite simple but I know there are people who may not have acknowledge about this, just use the keys "Alt" and "Enter" and you'll skip the right-clicking thing and selecting "Properties". Yes! just select the elements and press "Alt" + "Enter" to go straight to "Properties"...

Linked Images in Sharepoint

Image
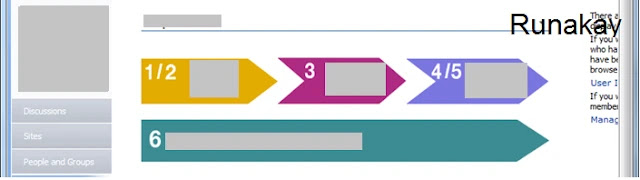
Yes! I'm back hahaha at least in this moment, I was and am very busy but I have several posts pending of being published so I will try to publish more frequently. In this opportunity I had to modify a Sharepoint site, because we are having a new process, so as a way to communicate this a site was designed, where graphically it's shown the new process divided into blocks.  But, the requirement itself was to have this graphic ready to be clicked with the purpose of sending the user to process block site. Yes, a linked image. To do so, first, it's necessary to have edit permissions on the site. Second, we have to access to "Content Editor"though "Edit" webpart option and once we have got in there, click on "Rich Text Editor...".   You will get something like, in this step you have to pick the image you want to have the link, and select the "Hyperlink" icon.   Once you do that, a window will be shown asking you for t...

Using Linked Servers in SQL Server

Image
When you work with software you have in mind that everything is interconnected, even more when you're talking about servers. And things could get really ugly if you need to make queries and see that a part of your information is located in another server. Fortunately, Microsoft SQL Server helps us in this situation giving us a feature that allows us to reference a different server and use it to make queries against it. So, let's open SQL Server Management Studio, get in to the server and go to "Linked Servers" folder located in "Server Objects".     Now, you have to create a new linked server by using the right-click button and the appropriate option.   In this ocasion, just type the linked server name on the textbox and select the type of this, keep in mind that you can connect to other sources different from SQL Server.   After you do this, on the "Security" section you have to specify the mapping between users and for the rest of u...

Reducing the Size of PowerPoint Presentations

Image
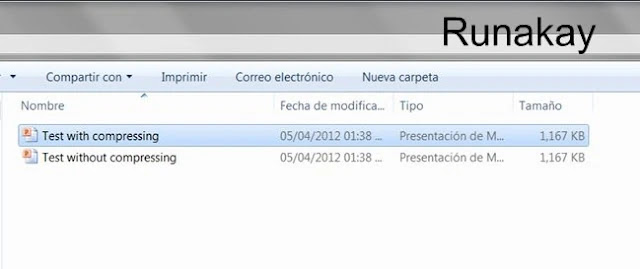
At work it's always required to make presentations in PowerPoint ... but sometimes these presentations have a considerable size that are needed to get smaller. And that is the reason of my next tip, which will help you with your big-sized presentations. I will use a PowerPoint file with 3 images on it and make a copy of it to prove that it's possible to reduce dramatically it size, let me show you the file itself and the 2 equal files that I have created.     Now, I will work with "Test with compressing" file to compress its images, because that's the key. The only thing you have to do is to select one image and go to "Compress Pictures" option which is located within "Picture Tools" ribbon.   Later, in the dialog box shown uncheck "Apply only to this picture" and pick "E-mail (96 ppi)", after that select "OK" button.   At this point the only thing that you have to do is to save you file and you wi...

Separating One Cell Text in Columns with Excel

Image
Many times I asked for punctual information but , in contrast, I received more than I had asked for. For example, I just wanted the name of the applications of a computer, but I got much more in just one column. Therefore, I decided to use one Excel feature named "Text to Columns".   In the window that appears with this option you have to select the characters you are going to use as pattern to separate each row in columns, in this case I selected just "Tab" and got what is shown in the image, as you can appreciate the application descriptions will be in a separated column. Having as a result this. Once you get what you wanted you can proceed to removing extra columns.

Exporting All Installed Applications in Windows

Image
When I helped someone to sell her laptop on internet I needed first to look at what applications were installed in this Windows 7. But, having this list in a file was not an easy task, therefore I searched on internet to get a way to do this. Finally, I used at that moment the command line " wmic " which also allows you to export this list in few formats, always remember first to open your command line window and type the command as shown in the image.     As you can see it's very simple just don't forget to specify the destination path and the format you want your output file (the options are: HTML , Table, XML and more). Once you got your file open it and you will see something like this. If you want to have this file in a more comfortable scheme just do what is said here and it will look like this.   Ready to be used.